Food equipment
Water equipment
Hay racks
Other equipment
Cleaning
Food equipment
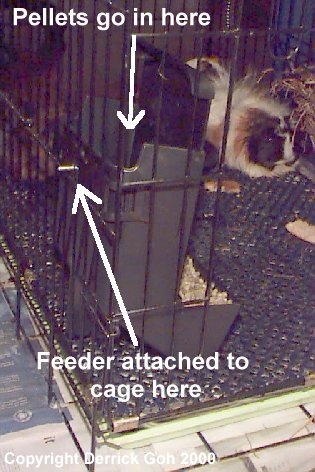
It is recommended that you put the cavy pellets in a food hopper which is sometimes called a gravity feeder. This is because cavies have a tendency to pee & poop inside their food dish. Not only is this unhealthy for cavies, it is also wasteful 'cos you have to throw out the soiled food. Another thing is that cavies tend to run a lot & may end up knocking over the dish. The hopper is suspended off the ground so there's no danger of them upsetting it. Make sure the hopper is not too high or your cavies can't reach it. They should be able to reach it without having to stand up.
So far I've seen 2 hoppers. The one on the left is from Lixit & although its labelled "for small animals", it is not entirely accurate. This is 'cos small animals include rabbits & chinchillas. The feeding area is far too small & is more suitable for gerbils, mice & hamsters. Large cavies have difficulty eating from it & I doubt chinchillas & rabbits can even eat from it. However it is fine if your cavies are small sized.
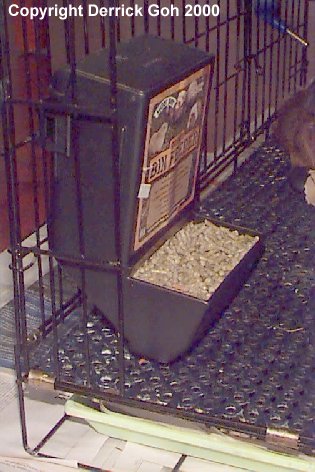
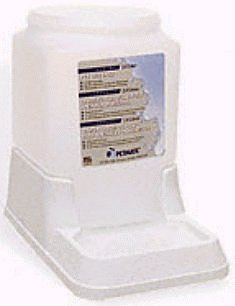
The one on the right is the Superpet Gravity Bin Feeder. This is a better choice if your cavies are large since its made for ferrets, rabbits & other larger small animals. However it is rather rare & so far the only shop I've seen selling it is Pet Lovers Centre. The Superpet feeder has a much larger feeding area which means your cavy will be struggling less to eat. Also, a larger feeding area means 2 cavies can eat simultaneously.
The Superpet feeder can easily store close to 2 lbs worth of pellets but I don't recommend putting in so much pellets. This is 'cos prolonged exposure to the air may result in the pellets having a shorter life & vitamin C also gets destroyed faster. So unless you're going away for a week or longer, don't fill the entire hopper. I usually only fill 1/4 of it.
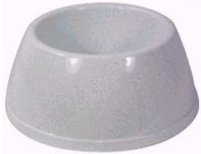
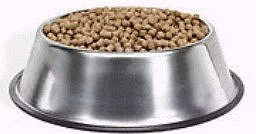
Dishes if used, should have a base which is larger than the top to prevent it from being tipped. Below to the left you see a picture of a ceramic bowl with a nice large base. To the right is a stainless steel bowl. Ceramic & stainless steel are good materials 'cos they are durable. Plastic is not too good since cavies have sharp teeth & tend to bite everything! A plastic bowl with many scratches can be a good breeding ground for germs 'cos they hide in the scratches.
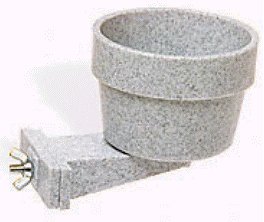
A third alternative would be crocks that can be mounted on the sides of cages. These are located off the ground so like hoppers, the chances of fur & poop getting in are reduced. However crocks tend to be rather deep so cavies may have difficulty reaching up & digging in. I think its more suitable for rabbits. Ultimately, I still recommend hoppers especially the Superpet one.
Water equipment
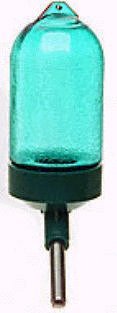
Make sure the bottle has a spout that is bent at an angle. Some bottle's spout faces downwards. Such bottles must be placed inside the cage if not the cavy can't reach the spout. I believe it is more comfy for them to drink from an angled spout. One type of water bottle uses a vaccuum valve to prevent water from flowing out. This is a bad choice 'cos these tend to leak more especially if fur or something gets stuck at the valve. You do not want a water fall in the cage! There's a pic of a vaccuum bottle below & as you can see, it looks just like a ball bearing bottle. Upon closer inspection you'd notice the vaccuum bottle has no ball bearing & that's how you tell them apart!
Water bottles with ball bearings are the best choice. Some bottles have 1 ball bearing & do not come with a rubber seal. That is why I prefer Lixit water bottles (pictured below). They have 2 ball bearings & even a rubber seal. This greatly reduces the chance of leakages. However I notice Lixit water bottles usually come with wires that are too loose so you may need to make your own wire support by bending some wire.
A rather innovative creation is the "top filling" bottle (shown below). For most bottles you'll have to turn them around, unscrew the cap & pour in the water. For the top filling bottle, the bottle can remain secured to the cage. You just open the top & use a mug or pitcher to pour in water. Very convenient but don't get lazy & start topping up water! Remember, the bottle should be cleaned daily under running water with a brush & fresh water should be given daily.
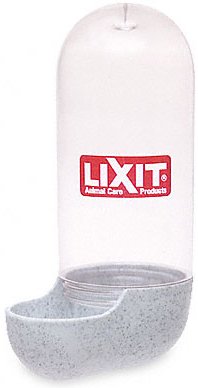
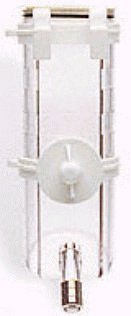
Bowls are not recommended 'cos fur & poop will get in & contaminate the water. Besides, your cavies may also bump into it & spill water. Besides bowls, another unsuitable equipment would be what is known as the "waterer". Pictured below, it works on the same concept as the food hopper, except this time its the water that automatically flows down instead of pellets. As with the water bowl, the danger of being knocked over as well as the high chance of fur & poop contaminating the water, makes the waterer a lousy choice.
Cavies need quite a bit of water so go ahead & get a large water bottle. After all, it's attached to the outside of the cage (with the metal spout pointing inwards) so it doesn't deprive your cavy of any space. A 16 oz bottle lasts my 3 cavies about a day.
Water bottles tend to have algae growing on the inside after a while. Everytime you take the water bottle out to clean it, take a good look & look out for any greenish stuff. If the algae has just started growing it may be difficult to spot, so you may need to hold the bottle up to the light. There's no way your fingers can reach all the way inside the bottle, so you may need to use a very thin & long brush used for cleaning baby bottles or a long toothbrush.
I recommend having 2 water bottles. Firstly, you should always have a spare bottle around. This is in case the bottle leaks or something & can't be used. If this happens at night, how on earth are you going to the pet shop for a replacement? Secondly, I find that if you alternate the bottles every month, you have less algae problem. So I suggest you invest in 2 water bottles of similar size.
Do not simply top up the bottle 'cos usually there are some stuff floating inside it. Pour out all the water, rinse the bottle well & then top up with fresh water. After hooking it to the cage, invert the bottle & tap the ball bearing several times to make sure water drips out. Sometimes when the water pressure is too great, no water flows out. So ensure water can drip out or else your cavy goes thirsty!
Hay racks
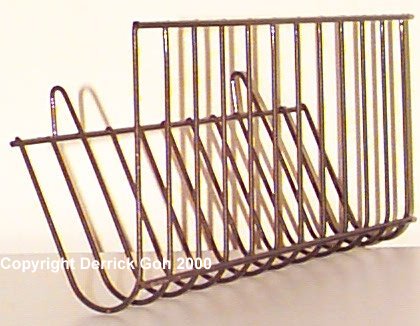
For some reason wire bottom cages don't come with hay racks & only some plastic bottom cages do. Fortunately hay racks are becoming more common in pet shops. There are basically 2 main types of hay racks. Those that are attached inside the cage & those on the outside. Externals racks are usually made of plastic & usually come with cages & are not sold alone. As for internal racks, those that come with cages are usually 2 sided (not safe. Read on for more details) while those sold alone are usually 4 sided (safer than 2 sided).
Those on the outside (pictured above) will occupy less space but tend to be more vulnerable. So if a clumsy person bumps into the cage, the rack will drop off. Hence you must ensure its properly fixed to the cage. The top of the rack has two hooks, one on the left & one on the right side. Both hooks should be be secured to the cage's bars. If you have no idea what I'm talking about, refer to the pic below. This is one of the rack's hooks secured to the cage.
The bottom of the hay rack should also be secured to the top of the cage's plastic bottom. Once again, refering to the pic below may simplify things. As you can see, there's no way the hay rack can be pulled out this way. If the hay rack's bottom is not secured this way, once you put in the hay, the rack will move outwards (away from the cage) & the hay will fall out of the cage. So far I've not seen these racks being sold here but it does come with some cages such as my Marchioro plastic bottom cage which comes with a grid (more of that in my "Housing" page).
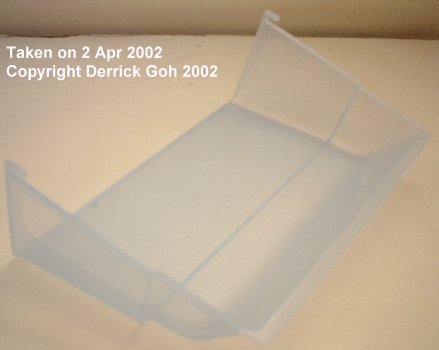
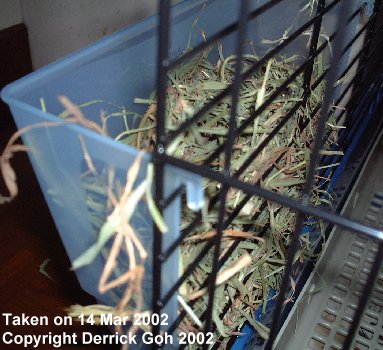
The other type of hay rack is located inside the cage. There are 2 kinds, one which has only 2 sides (first pic you see below) & one which has 4 sides (second pic you see below). The one with 2 sides is fine provided your cavies are too big to jump or climb onto it. Pikachu used to jump onto my hay rack & Fe Fe did that too. This is dangerous 'cos they can get stuck or break their legs. As a result, I switched to a hay rack with 4 sides. As you can see from the pic, it is impossible for your cavy to jump or climb into the rack with 4 sides & this is good news.
Racks inside the cage should be secured to the cage 'cos cavies may bump them off. One or two bumps on the head by the hay rack falling off is bad enough. But I'm more concerned that they may try to climb over the fallen rack & break their legs in the process. Hence you can use plastic coated wires to tie the rack in place. This way, the rack will never fall off even if it's been bumped several times.
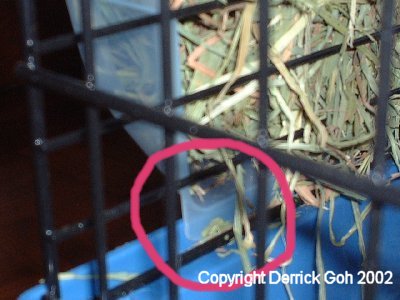
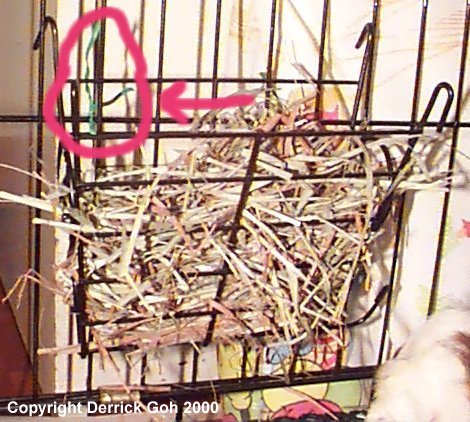
Look at the pic below & concentrate on the pink circle I've marked out. You can see a green wire there. That's one of the two places where you can secure the rack with plastic coated wires. Just make sure the wires point out of the cage, so there's no way the cavies can reach it. If you're alert, you'd also notice this hay rack isn't hooked onto the wire cage via its own hooks. Instead the green wires are holding it in place.
This was the old hay rack I used with my old cage. I couldn't find a suitable place to hook the rack. The rack would either be too high for the cavies to reach or touching the ground. If you have a similar problem with a hay rack that doesn't fit, do what I did. The hay rack has horizontal bars right? Well simply raise the hay rack to a suitable height & ensure one of the rack's horizontal bar is in line with one of the cage's horizontal bar. Get someone to hold the rack there while you tie 2 plastic coated wires around both horizontal bars. This way the rack will be of a suitable height AND your cavies will never be able to bump it off.
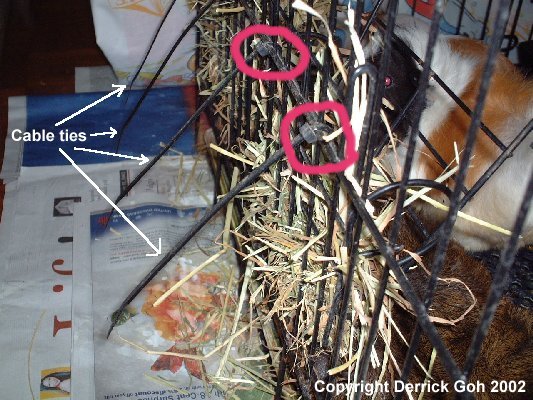
However these wires may loosen with time & if you push the hay into the rack too hard, it may even give way. So I changed to nylon cable ties. You insert one end of it into the hole located at the other end & pull. It works only in one direction & once the hay rack is secured, there's no way of moving it unless you cut the cable ties with scissors. Should be available in most hardware shops. As you can see from the picture below, each hay rack has been secured by 2 cable ties. But ever since changing to a Marchioro cage which came with its own plastic hay rack, I've not had to use my wire racks.
The hay rack shouldn't be too high or your cavy will have trouble getting the hay. But it shouldn't be too low either or your cavy will be able to jump into the hay rack, especially if its the 2 sided type mentioned above. You want to prevent them from happening 'cos the cavy can easily break its leg walking inside a hay rack even if the rack is practically touching the ground. I would recommend the lowest part of the rack should be at least 10 cm off the ground, but that would depend on your cavy too 'cos I've seen some really small cavies.
I don't recommend making your own racks especially since hay racks are becoming more & more common in pet shops. Wire racks tend to rust easily & should be replaced once they become too rusty. Plastic racks (such as those that attach to the outside of the cage) last longer 'cos they don't rust.
Other equipment
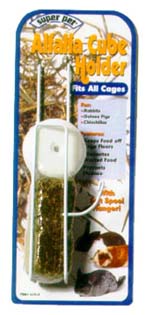
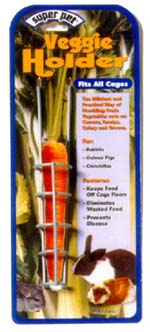
Hay rack, food hopper/bowl & water bottle are the absolute necessities for cavies. Other equipment aren't really necessary. You can do without things like alfalfa cube holders, vegetable holders, wood chew holders, etc. In fact sometimes they only take up extra space & don't serve much purpose. I've known cavies who pull vegetables from the holder & leave them all over the floor. Besides, not all veggies can fit in there!
Cleaning
Water bottles should be cleaned daily. Don't just top up the water. Clean it first but don't use soap or detergent. Some people insist they rinse the bottle well after soaping it, but I still don't recommend doing it. Use a long, thin brush to scrub the inside of the bottle & also the metal nozzle & it is sufficient. No soap is needed!
Hoppers & bowls are easier to clean but once again no soap! Instead use a handful of salt & a scouring pad to scrub the hopper or bowl. The soap wil kill bacteria & the scouring pad should remove dried on dirt. Rinse well & make sure it is dry. This is very important 'cos if you put pellets in a semi-dry bowl or hopper, they will definitely go mouldy. You wouldn't want your cavy eating mouldy pellets!
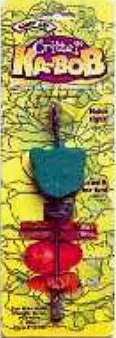
Hay racks are often neglected but must be cleaned too. Plastic hay racks that attach to the outside of cages are the easiest to clean. Just scrub with a handful of salt & a scouring pad. Rinse well & dry well. Hay can get mouldy too so dry that rack well! For metal hay racks, use a damp cloth to wipe it once a week. If you wipe it once a week, it shouldn't get too dirty. If you wipe once a month or longer, it will be quite dirty. And the dirtier it is, the harder it is to remove the muck! Other holders such as vegetable holders & Superpet Kabob have to be cleaned too. Wiping it once a week with a damp cloth should suffice.