Introduction
Plastic bottom cage
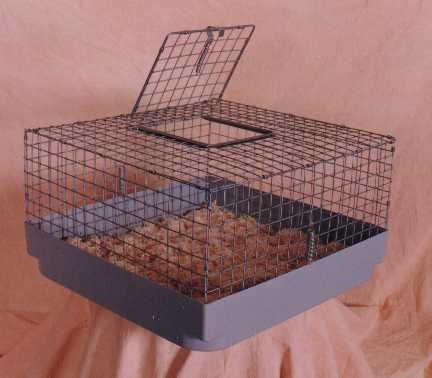
Wire bottom cage
Plastic bottom cage with grid
Coroplast & Cube cage
Summary of suitable cages
Unsuitable habitats
What size cage?
Where to put the cage?
Hut in the cage
How often to clean the cage?
Introduction
There are basically 3 types of cages. Plastic bottom, wire bottom & what I call plastic bottom with grid. Plastic bottom cages are the most common & I'm sure you must have seen them before.
Wire bottom cage is essentially a cage made completely from metal bars including the bottom. These cages are foldable for easy transportation & are usually higher than plastic bottom cages. Plastic bottom cage with grid looks like a regular plastic bottom except there's a plastic grid for cavies to walk on so their pee & poop falls through.
Plastic bottom cage
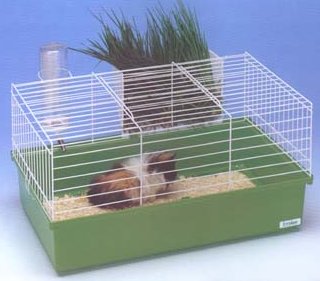
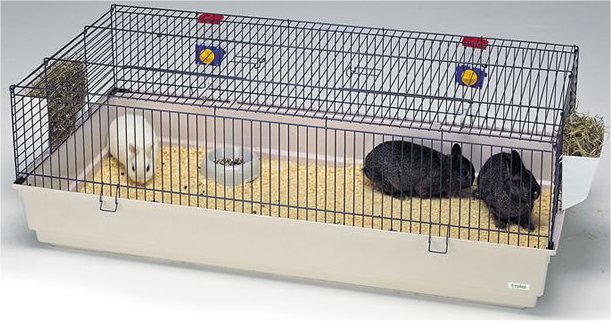
Plastic bottom cage as the name implies, has a plastic "tub like" bottom. The upper part of the cage is made of metal bars & can be removed. The cage featured below is the Ferplast Gioco Rabbit 140 & it measures 140 X 71.5 X 48 cm (L X W X H). Its probably the largest plastic bottom cage you'll ever find in Singapore. The other common brand for plastic bottom cages is Marchioro & their largest plastic bottom cage measures 118 X 58 X 52 cm.
Some say non-solid bottom cages (such as wire bottom cages) are dangerous 'cos cavies may break their feet walking on the "holes". I feel that if precautions are taken (pls refer to the wire bottom cage section for more info), this is unlikely to happen. But if you want to be 100% sure, then use a plastic bottom cage.
You will need to line the cage with bedding. Pls refer to my bedding sub-page for more info. Its recommended to make the bedding at least 3 to 4 cm thick 'cos cavies tend to dig. The problem with plastic bottom cages is that cavies will be sitting in bedding which is full of their pee & poop. I have personally tried newspapers, shredded aspen shavings, aspen shavings & kiln dried pine pellets. They all had different disadvantages (more in bedding sub-page) but the common disadvantage they shared was poor mositure absorbancy & poor odour control.
The cage will stink after only a day & the bedding either did not absorb the pee at all, or it absorbed but was damp so my cavies were lying on damp bedding. This is bad 'cos not only is it unhygienic, but it can cause skin irritation too. During cold weather, your cavy may even catch cold from lying on damp bedding. Also, they frequently stepped all over their own poop.
It was because of these problems that I decided not to use a plastic bottom cage with bedding. I was looking for a way to keep my cavies dry & away from their poop. My friend Melissa recommended a wire bottom cage. Pls proceed to the next section for more info on it.
Wire bottom cage
Many fear wire bottoms cages 'cos they say cavies can break their legs walking on non-solid bottoms. They also claim such cages result in a foot problem called Bumblefoot. Peter Gurney (UK cavy expert) has this to say about Bumblefoot:
"As far as I know, no person or veterinary authority has ever got the the bottom of this very common problem in guinea pigs. When it was first noticed in laboratory animals the commonly held theory was that it was because the they were housed in cages with wire mesh flooring. In mine and most people's experience there is no correlation between it's prevalencein guinea pigs and the type of housing they live in.
It could be related to fungal infestation. Though we have no scientific or research data to base this claim upon, our experience in treating many guinea pigs with generalised fungal problems certainly points this way. If the patients happen to also have Bumblefoot, in a very high percentage of them the swelling is greatly reduced and in quite a few the feet return to normal after they have been put on a course of Griseofulvin.
Occasionally a swollen foot could be the result of minor injury which has become infected and a small abscess may have formed. However, Bumble foot in one foot is relatively rare. Though this condition looks extremely painful, and in it's early stages it causes some animals to hobble, they seems to settle down and cope with it without any other effect on their health. I once read that it could spread up the leg and cripple the animal but now, in my eleventh year of living with these animals and seeing many cases of Bumblefoot, I am still waiting for the first 'Zimmer frame' case or a fatality that I could positively say resulted from Bumblefoot."
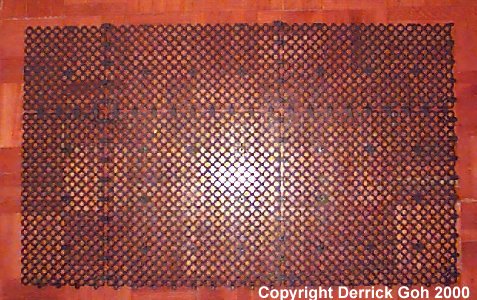
So its obvious wire bottom cages DO NOT cause bumblefoot. As for the fear of broken legs, this can be greatly reduced by using this method my friend Melissa taught me. Use rubber mats with holes to cover the wire bottom. These mats (pictured below) can be found in DIY shops. These mats have holes ranging from 1 cm in diameter to wider. If the holes are 1.5 cm or smaller, it is fine. Any larger and the holes are too large & thus unsuitable.
The whole idea is that the rubber mat provides a safer flooring since the holes are 1.5 cm wide or smaller. If wire bottom cages are used without these mats, the gap between the metal bars can be as wide as 2 cm & chances of cavy feet being broken are higher. If you decide to use a wire bottom cage, you MUST use these rubber mats. Line the entire wire bottom with these mats. Chances are that you'll have to buy several pieces to form a huge piece & then trim the huge piece to size.
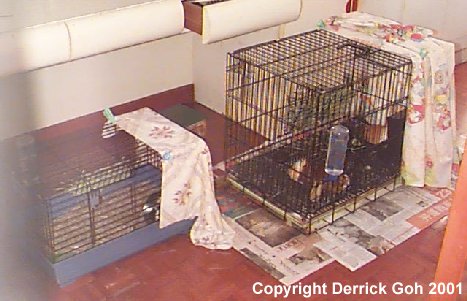
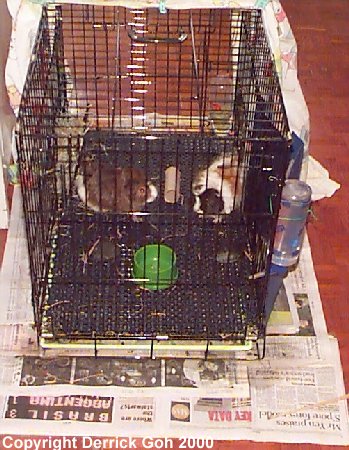
Wire bottom cages come with a removable plastic tray but chances are the tray will not cover the entire bottom of the cage. Hence you might end up with pee & poop that "overshoots" the tray & ends up on the floor. To prevent this, put lots of newspapers below the entire cage. Make sure the paper exceeds the cage by at least 5 cm or else it'll not be able to "catch" the pee & poop that overshoots. Below is a picture of my former cage with the newspapers below & around it. I know it looks messy but it sure is better than finding your floor pull of pee & poop!
Anyway, let's continue the story from the plastic bottom section! Melissa recommended using a wire bottom cage with rubber mat. The pee & poop will fall into the removable tray & they would then be dry & clean. However what sounds good in theory may not work in pratise. After a month, I noticed all 3 cavies' stomaches & rear legs were very brown & dirty. I didn't understand why this was the case. After all the pee & poop drops below into the tray. So why were they getting dirty still? This continued for a long time before one day I discovered the reason.
The rubber mat tended to "keep" pee. You see, as cavies pee there's no way that stream or jet of pee will go nicely through the holes everytime. Sometimes it will splash against the surface of the mats. And the pee remains there. So when my cavies walk all over it & lie on it, they get dirty. So using a wire bottom cage didn't solve my problem. One fine day I was at Joy Doggy petshop & came across a plastic bottom cage with a grid. Yup, more on it in the next section.
Plastic bottom cage with grid
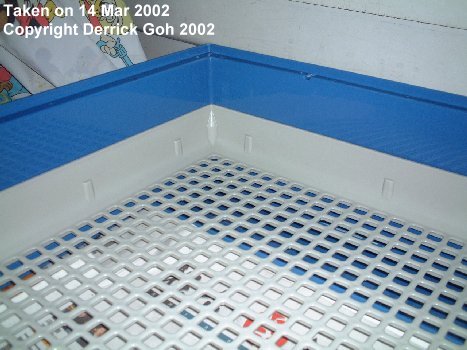
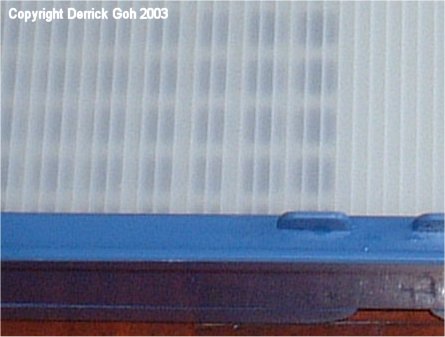
This cage is exactly the same as a plastic bottom cage except it has a removable plastic grid.
Marchioro is the only brand with this kind of cage. Ferplast cages are plastic bottom but do not come with plastic grids. However not all Marchioro cages come with the plastic grid. The largest Marchioro cage doesn't. So I guess you can say my cage is the largest Marchioro cage that comes with the removable plastic grid. There's the grid below.
On to my story again! So I saw this cage & felt that since plastic is more "smooth" than rubber, less pee should remain on the grid. So I bought the cage to try. Didn't work too well. The same problem occurred. When they peed, sometimes the pee will splash on the grid's surface. I had to keep wiping the pee off. Naturally I can't do it all day, so the same problem occurred as with the wire bottom cage. Their stomaches & rear legs were dirty within a month.
It was getting so frustrating! These cages are meant to keep them dry but they're still getting wet. Then one day I discovered a new bedding called Breeder's Choice Cat Litter. Its pelleted recycled newspaper bedding (more info about it in my bedding sub-page). I don't know what prompted me to take this risk (after all it could've failed again) but I decided to use it.
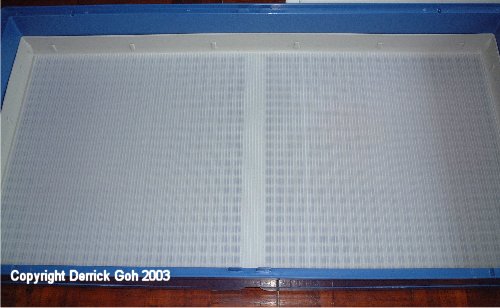
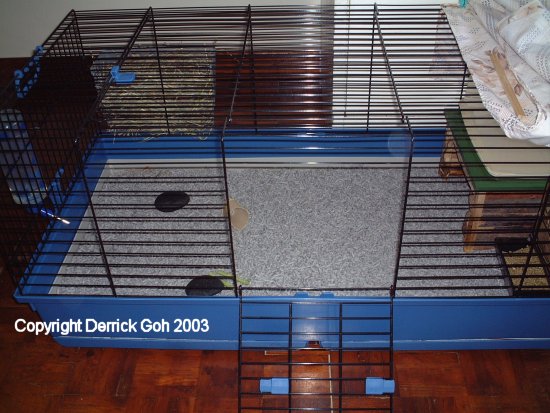
But my cage had the grid. No way I can use bedding. That's when I hatched the idea of covering the grid. So off I went to Popular Bookshop to buy a piece of Coroplast (they call it corrugated plastic board). I bought a piece about 98 x 48 cm & it costed me about $7. Coroplast is excellent 'cos its waterproof & can be washed if dirty. I guess you can buy a piece of acrylic instead but it costs more.
So I placed the Coroplast on the grid, thus covering the holes (as pictured above). I ordered a 13.3 kg bag of Breeder's Choice & used about 1/4 bag to ensure the layer of bedding was about 4 cm thick. A big cage needs lots of bedding you know! The cavies took to the bedding well & were soon snoring on it. Well, at least they like it! Now came the big question. How does it work?
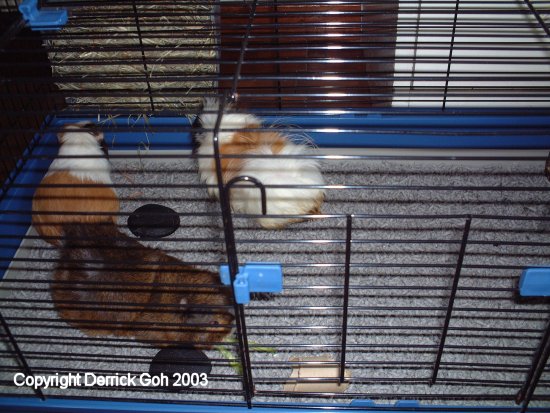
Fortunately, it worked like a charm! Out of all the beddings I've used, BC is the best! You can find more info about it on my bedding sub-page but basically it kept my cavies dry. I know it sounds ironic. The 2 cages with holes that are supposed to keep them dry, failed & they got dirty within a month. Using BC however, kept them dry. This stuff absorbs the pee & holds it in so well that even if you squeeze a dark grey pellet (dark grey means its wet), no liquid drips out.
Its been almost 2 months & the furballs are still clean as ever. Different people will probably have different experiences with bedding & cages. For me, I have found the perfect solution. So if you ask me, I'd say get a plastic bottom cage & use BC bedding. Or if you have a plastic bottom cage with grid like mine, just cover the grid & use BC bedding.
Summary of suitable cages
Plastic bottom cage
Wire bottom cage
Plastic bottom cage with grid (grid covered)
Plastic bottom cage with grid (grid uncovered)
Coroplast & Cube cage
Unsuitable habitats
Cages are your best bet & I don't recommend any other type of housing. However I shall name some housings that I've seen & explain why they're not suitable.
Aquariums used to rear fish are a definete no no. Singapore is pretty hot & humid & the poor little furball's gonna get a heat stroke! The air circulation is also very poor in aquariums. Besides how are you going to hang the water bottle, hay rack & food hopper? Wooden hatches are not good 'cos they absorb urine & can be tough to sanatise. A poorly made wooden hatch may also have splinters or sharp edges which are dangerous.
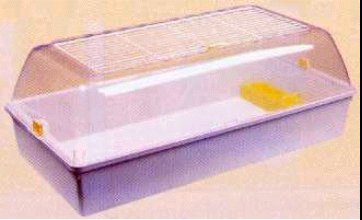
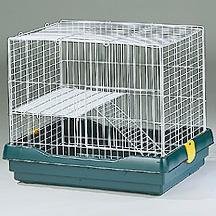
Another unsuitable cage is the one picture below. Unlike a plastic bottom cage with wire top, this one has a plastic top. This cage is supposed to be good 'cos the high sides prevent shavings from being kicked out of the cage. However it also has poor ventilation. In addition the opening to the cage is at the top which I don't like. Cavies tend to struggle & putting it in from the top, you risk it jumping & hurting itself. Not a good idea!
The cage pictured below is also not too great. At first glance it may seem okay however, notice that the opening is at the top & not at the side. This is bad 'cos cavies tend to struggle when you take them out of the cage & also when you return them to the cage. If the opening is at the top, if the cavy manages to squirm free from your hands, its gonna be quite a long drop for it & it may get injured. Wherelse if the opening is at the side of the cage, the distance if the cavy should fall is less.
Never ever use hamster or gerbil cages because they cater to rodents who are significantly smaller than cavies, so size will be a problem. Some cavies have been known to be the size of a large tennis shoe! Some of these cages will come with toys like hamster wheels or ladders & stuff for hamsters to climb. While I'm on the topic of toys, allow me to deviate a little.
Be very selective when choosing toys for cavies. Most toys you see are for hamsters or gerbils.
These are all bad for cavies because cavies are less active than hamsters. Cavies have been known to break legs on the hamster wheel. Being a little more clumsy than hamsters, cavies have also been known to fall off hamster ramps & get injured. Choose only "guinea pig safe" toys. If unsure, don't get it! A toilet roll is a cheap & safe toy & when your cavy chews it, it is also wearing down its teeth. However if your cavy is small & can get stuck in the toilet roll, I suggest you cut it along one length so that if your cavy gets stuck, it is less difficult to free itself. Some toilet rolls has dried glue on them & needless to say, those are not suitable.
A smooth stone or two will also give them something to discover. Mine uses the stone as a pillow! Corn on the cob if dry can be kept in the cage for up till 3 days. They chew on it to wear their teeth down & seem to enjoy rolling it around. Ok deviation over, so now let's go back to talking about cages.
Cages with multiple floors like the one in this picture below are not suitable. Notice how steep the ramp is. Cavies are not very agile animals so don't ask for trouble by giving them such obstacles, even if the ramp is gentle. Besides, notice the ramp has gaps in them. It'll be a disaster if their feet go through those gaps. Ramps are a big no no regardless of whether the ramps have gaps or not! So nothing fancy, just a single floor cage.
Besides the few housings I mentioned above, other unsuitable housings include styrofoam, plastic & cardboard boxes. Anyone with half a brain would know that these are ridiculous choices for housing but you do have a handful of morons using them!
What size cage?
The next most common question would be "How big?". Some people say to allow at least 2 square feet for each cavy. A cage measuring 2 sq feet would be 2 ft long & 1 ft wide.
According to the Admiral Metals Automated Metric Conversion Calculator, 2 ft is equal to 60.96 cm while 1 ft is 30.48 cm. A 60.96 X 30.48 cm cage doesn't sound ridiculously big, but remember, those people say 2 sq feet per cavy.
So if you have 10 cavies & follow the 2 sq ft guideline, you need a 20 sq ft cage. That's 10 X 2 ft or 304.8 X 60.96 cm. Do you have any idea how big that is?! Where on earth are you going to find such a huge cage? No commercially produced cage is anywhere near that size. And good luck if you intend to make a C & C cage that size! Besides, how many of us have so much space in our home for this gigantic cage? And do you have any idea how much bedding such a huge cage requires? You'll go broke just buying bedding alone! Of course some would argue & say that multiple level cages can be used. I don't recommend this at all 'cos cavies are not agile. So even if the ramps are solid (no gaps) & the slope is not steep, I still don't recommend it.
Therefore I feel the 2 sq ft guideline is ridiculous & shouldn't be followed. My cage is 100 X 53 cm & it houses 3 adult cavies who have enough space to run all over. 4 cavies in a similar sized cage would be a bit tight, while 5 cavies would be overcrowded. For a small cage about 61 X 36 cm, I recommend at most 2 adult cavies. 3 would be overcrowded already. Try using these 2 examples as a guide. Don't forget that young cavies will grow so unless you intend to buy another cage later, get one that's big enough for adult cavies.
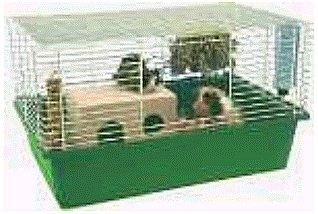
A cage like the one below is really very small even for 1 cavy. There is barely any space for it to run about & if the owner doesn't change the bedding often enough, you bet the poor dear will be moving about in its own pee & poop. You will also notice the opening of the cage is at the top. This isn't recommended 'cos cavies tend to struggle when you return them to the cage. If it should fall from that height, it can get injured. Choose a cage which has a door on the side instead. At least 1 opening along the length of the cage but if your cage has another opening along the width, better still!
My plastic bottom cage with grid comfortably houses 3 cavies although if I was willing to squeeze a bit, I could add another 1. For the record, my plastic bottom cage with grid measures 100 X 53 X 47 cm (L X W X H) or 38.5 X 20.5 X 18.5 inches. This is much larger than my previous wire bottom cage which was 30.5 X 19 X 22.5 inches. Compared to my previous plastic bottom cage which was only 24 X 14 X 15 inches, my current cage is huge!
But no matter how big your cage is, you'll still need to let them out to play. If you have your own garden & are sure no pesticide is used, go ahead. The grass patch near your flat is a bad idea because those are sure to have pesticide, dog poop, human phlegm & other such gross stuff. I let my cavies run about in my balcony. Choose a suitable room & make sure you "cavy proof" it. Cover up any cracks or gaps that the cavy may squeeze into. Any wiring should be at least 15 cm off the ground. Small items which can get swallowed should not be left around.
It may be tempting but don't put too many things in the cage. Its no point having a huge cage if you're going to fill it with houses, rocks, toys, etc. In the end your cavy will still have barely any space since the cage is filled with junk!
Leave a small box in the room so that the cavy can hide in it if it's scared. When its time to put them back into their cages, be very careful. Cavies are known to follow human feet around! Don't run after it & chase the poor thing around the room. Instead, use one hand to chase it into your other hand. And try to kneel or squat because that way you seem less gigantic & frightening to our vertically challenged friends!
Where to put the cage?
You'd want to find a place where you can place the cage permanently 'cos its not advisable to keep changing locations. Next make sure the cage is not in direct sunlight not even for 5 mins. Keep in mind that certain areas of the house may or may not get direct sunlight depending on the time of the year. However the cage shouldn't be in total darkness either. I place my cage somewhere in the middle of my bedroom where direct sunlight never reaches & yet there is enough brightness.
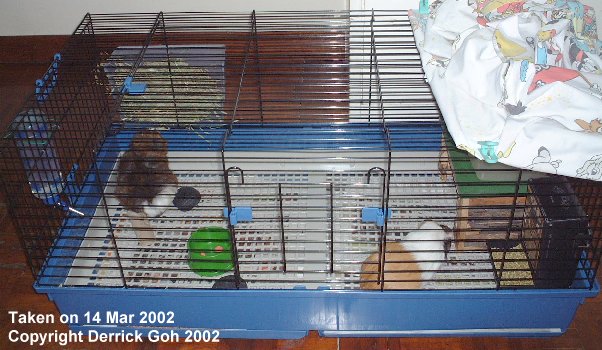
It is vital to ensure your cavies don't get direct wind. Some wind occasionally is fine but not when there are strong gusts of wind for prolonged periods. You may have to use a cloth to cover parts of the cage to protect them from direct wind. The area where I place my cage does have some direct wind from the window. Hence I use an old bedsheet to cover the right side of the cage where most of the wind comes from. Do not cover the entire cage 'cos the air ventilation will be very poor. See the pic below for an example.
Its not as if we have winter in Singapore so no matter how cold it is, you should never cover the entire cage! Half the cage in cold weather is fine but at all other times, covering a quarter of the cage should suffice. Having said that, if the area you choose has no direct wind at all, then you can forego the cloth.
With regards to what is used to cover the cage, I feel old bedsheets are the best. They are large enough & if your cavies somehow manage to chew on it, its not as harmful. Someone who posted on my discussion board suspected his cavy died from chewing the plastic shower curtain he used to cover the cage. That's tragic & hence to avoid such accidents, I advice you to use linen. Bedsheets, giant towels, etc. Just avoid things which cavies can chew, swallow & possibly die from such as plastic shower curtains, plastic book wrappers, etc.
Hut in the cage?
Cavy owners are divided in their opinions on yet another topic! Some feel that a shelter of some sort should be placed in the cage 'cos it gives cavies a place to rest in & also some where to hide should something scare them. Then there are those who feel that shelters are bad 'cos they encourage cavies to hide in there all day & not come out.
Personally I feel that shelters are fine as long as your cage is big enough. I'd never dream of putting a shelter in my previous cage 'cos there would've been no space left for them to run. Cardboard boxes are okay except they get chewed up real quickly. Make sure the cardboard box is not coloured or bleached. Since its very light, it probably would get toppled over & peed on too, so expect to change cardboard boxes once every 2 weeks or so!
Make sure you cut away 2 sides of the cardboard box so that there's no way your cavies can get trapped inside an overturned box. The side touching the ground should be cut away & also another side to enable them to walk in & out of the box. Keep an eye out for staples & glue on cardboard boxes.
Plastic & styrofoam boxes are bad 'cos you don't want your cavies chewing & swallowing the plastic or foam. Metal conducts heat & cold & is unsuitable too. Wooden boxes are fine but just as for cardboard boxes, make sure 2 sides are cut away. The wooden box must NOT be painted or have varnish or other forms of finishing on it. Just plain unfinished wood. Not cedar or pine wood please! Plywood isn't great 'cos one side has a plastic laminate which could be chewed or eaten. Look out for any nails or screws. You can also sandpaper the entire box just to be on the safe side to protect against splinters.
To save yourself a whole lot of trouble, you can always get a wooden hut from pet shops. Sam, Yick & Co petshop sells Bunny brand huts. These are made from unfinished wood & come in one solid piece. That means if your cage has a small door, you may not be able to squeeze it thru the door. Also, its really big so you're sacrificing your cavies' running space. Good if your cage is real big & had large doors. Costs about $35 I think.
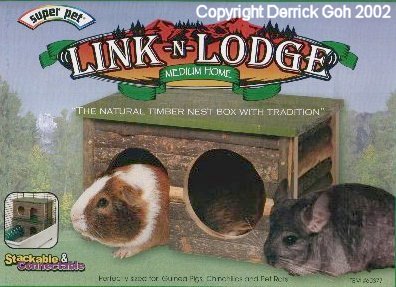
Another hut is "Superpet Link N' Lodge Timber House" (pictured above) which is sold at Planet Pets. This one is slightly smaller than Bunny & can be taken apart. So you can assemble the hut inside the cage. Good if your door is small. However it has a painted roof & the sides are varnished. If your cavies love to chew, this hut is a bad idea. But if they seldom chew, then I guess you're quite safe. You can actually join several of them to form a really long house but I doubt your cage can accommodate such a long house!
The medium sized one costs about $28 & can house 2 adult cavies if they're lying perpendicularly. "Superpet Link N' Lodge Timber House" also comes in small size but I don't recommend it 'cos its really small & I think can house only 1 baby cavy! If your cavies love to climb or jump, this house is also not suitable 'cos it has a flat roof, making it easy to get up on. The Bunny brand hut has an inverted V shape roof, so no way anyone can get on that! The Superpet roof is not nailed on so you can either glue it on with the provided glue or leave it alone. I prefer to leave it alone so I can remove it & reach the occupants in case of emergencies.
Lastly, the 2 openings at the front of "Superpet Link N' Lodge Timber House" are too small for adult cavies so you may have to do what I did, which was to saw off some parts of the front to make a large opening (see picture above). Make sure you sandpaper after that to remove splinters.
Please make sure your cage is big enough before you introduce a hut. The picture below is a good example. The cage is not very big to begin with & with a hut inside, there is even less space for running. Personally I recommend putting a hut in only if your cage is 2 feet X 2 feet or larger. If given a choice between a hut or more room to run, I think your cavy would rather have more space.
In the past when I used a smaller cage, leaving the hut in the whole day meant less space to run. So I'd place the hut in only at night since it tends to be colder. First thing in the morning the hut comes out so they have more space to run. So this way they get to enjoy the hut at night & also get to enjoy more space during the day. But now with this huge cage, I can leave the hut in there forever & they still have space to run.
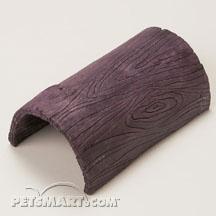
An alternative to the hut or house would be a man-made log like the one pictured below. The one in the picture is made from poly resin & I don't know if its dangerous if cavies chewed it & smallow the poly resin pieces. Hence if I want to get a log, I'd rather play safe & get one made from wood. I believe Superpet sells those but I don't have a picture yet.
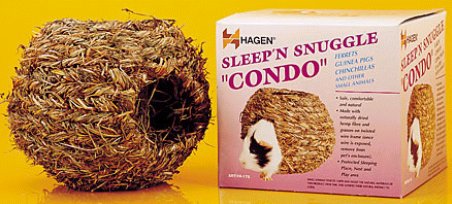
Besides the hut/house & log, there's another alternative called the "nest" (pictured below). However I DO NOT recommend nests. This is 'cos the frame or bodywork of the nest is actually wires. The natural fibres cover these wires but there's a possibility that the wires may be exposed especially if your cavies start chewing the fibres. Once the wires get exposed the danger of your cavy getting injured by the exposed wire is very high. So I strongly advise against using nests unless one day they develop nests without wires.
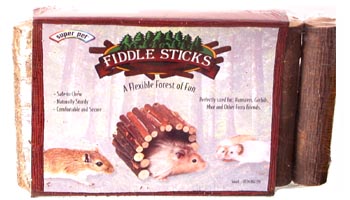
Something closer to the "log" would be Superpet Fiddle Sticks. I have a pic of that below & as you can see, it is almost similar to the poly resin log featured above. However this one is natural so its fine if your cavies decide to chew it. If you have enough space & enough Fiddle Sticks, you can construct quite an amazing maze full of hide outs!
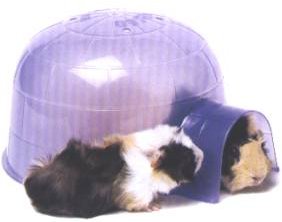
Another possible "house" is an igloo (pictured below). I have yet to see these being sold in Singapore. However these are not practical. Firstly the opening is usually too small & needs to be cut open. The second problem is heat. Singapore's weather is hot & humid & you can imagine how warm & stuffy it can get in the igloo. That is why I don't recommend it, should it be available here one day.
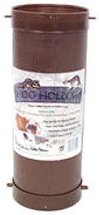
Superpet Hog Hollow is another hide-away however I don't really recommend it. Its diameter is 3.5 inches which is large enough for most cavies to crawl through. However it is a log & may roll about. I don't know if its dangerous but I don't like the idea of a cavy crawling about in a log which is rolling around. I imagine the poor thing will be rather scared & also giddy!
How often to clean the cage?
"Mucking out" should be done daily while thorough cleaning should be done at least once a month although I prefer to clean thoroughly once every 3 weeks.
"Mucking out" simply refers to getting rid of soiled bedding/litter & replacing with new ones. I shall start with plastic bottom cages first. The first thing to do when mucking out is to be alert & look for wet bedding. Remove any bedding which is wet. If the remaining bedding is dry you can re-use it. Just spread it out & add more bedding. Ensure enough bedding is added to replace the wet bedding you removed earlier. Remember that if you don't use enough bedding, its as good as not using any bedding at all.
For wire bottom cages or plastic bottom cages with plastic grid, the process is similar. Pull put the removable tray & scoop out wet litter. Remaining litter can be re-used if dry. Spread it out & add more litter. But there is an additional step. Use a dry cloth to wipe the top of the grid (the surface which the cavies walk on) to remove any urine which might be there (cavies don't always aim directly into the holes!). Also, the grid may be wet after you feed them vegetables 'cos there's no way you can dry the veggie 100%.
Mucking out should be done daily. Some people muck out the cage every 3 to 4 days or when it smells. Don't do that! You wouldn't want to live in your own filth would you? By the time the cage smells bad to you, can you imagine how putrid it would be to our fuzzy friends? Not only does it stink but its also bad for their health & skin. So please muck out daily. Shouldn't take more than 20 mins.
Thorough cleaning as said earlier, should be done at least once a month. If you have the time to do it once a week, all the better but its not really necessary unless your cavy has fleas/lice/mites then maybe the vet might recommend it. Once again I shall start with plastic bottom cages.
Use a damp cloth to wipe the metal grille top. Do not wash it or it may rust. Now we come to the plastic bottom. First of all, look out for any pee or poop stains. These can be removed with white vineger. In order not to waste vinegar, I prefer pouring it into a spray bottle. My bottle is filled with about 1/4 white vinegar & 3/4 water. Spray on the affected area, let it sit a while & scrub. Repeat if needed. Once the stains are gone, rinse the cage & you can begin scrubbing it with dishwashing liquid & a brush. Scrub well since this is meant to be a thorough cleaning.
My reason for using the vinegar before washing the cage is that the vinegar smell is quite strong. The smell may irritate your cavies. So I use vinegar first then wash the cage. This way the dishwashing liquid will remove the vinegar smell. Rinse the plastic bottom well & dry well. After that you can add fresh bedding and put the metal grille top back. Viola, you're done!
A plastic bottom cage with plastic grid is similar. Wipe the metal grille top with a damp cloth & set aside. Pull out the plastic grid & use vinegar & brush to remove pee stains. Use dishwashing liquid & brush to scrub the grid. Rinse it & dry & that's the grid done. Now for the removable tray. Remove it & do the same thing. Vinegar & brush for pee stains & dishwashing liquid & brush to scrub. Rinse & dry & its settled. Lastly, the plastic bottom. Yes, same story! Vinegar & brush then dishwashing liquid & brush. Rinse & dry. Assemble the cage, add fresh litter to the tray & viola!
If like me, you're covering the holes of the plastic grid, then its a bit different. The cleaning process is almost similar to the above paragragh, except you now have one extra piece to wash, which is the Coroplast. But don't fret! Both removable trays should be nice & clean since there's no pee in it, so you should be able to just rinse it.
Wire bottom cages are a bit more difficult to clean thoroughly. The tray is dealt with the same way. White vinegar & brush to remove pee stains, followed by dishwashing liquid & brush to scrub. Rinse & dry. To clean the wires or grilles of the cage, you might want to have a tub of white vinegar solution. Dip a cloth in it & squeeze dry. Use this cloth to wipe the entire cage. When it comes to the surface which the cavies walk on, you might have to scrub harder with that cloth. Or you can use a brush to help too. No dishwashing liquid for that wires or grilles!! Once you're done scrubbing, don't forget to wipe the grilles with a damp cloth to remove traces of vinegar.
Wire bottom cages must always be used with rubber mats (as explained earlier on this same sub-page). Those mats should also NOT be washed with dishwashing liquid. Instead use diluted Dettol solution & a brush to scrub it well. Rinse & dry. Put the mat back on the surface, add fresh litter to the tray & viola!
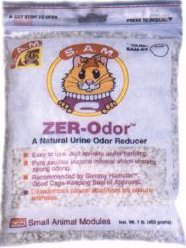
A product which I've not seen here yet is S.A.M. ZER-Odor (pictured below) which is an odour absorber. You're supposed to sprinkle it under the bedding & it helps control the stench. Its made from pure zeolites which is a natural mineral so it should be safe. The problem with odour absorbers is that it may give the false impression that the cage is clean when it is actually not. It may not stink but there could be lots of poop & the bedding could be very wet. The tendency is for people to change bedding only when it stinks & this is wrong. However some people still do that & that's when odour absorbers are "bad".

 Takes the least time to clean.
Urine will not overshoot & the floor surrounding the cage is dry.
If you use at least 4 cm of Breeder's Choice, your cavies should remain nice & dry.
 Bedding required. (Extra cost)
Bedding must be replaced.
Have to pick up poop daily.
Bedding not required unless you use it as litter in the removable tray. (Save money)
Cavies still get wet desite the holes.
Rubber mat needed for safety precaution. (Extra cost & more cleaning to do)
Takes a long time to clean.
Urine will not overshoot & the floor surrounding the cage is dry.
If you use at least 4 cm of Breeder's Choice, your cavies should remain nice & dry.
Bedding required. (Extra cost)
Bedding must be replaced.
Have to pick up poop daily.
Urine will not overshoot & the floor surrounding the cage is dry.
Bedding not required unless you use it as litter in the removable tray. (Save money)
Cavies still get wet desite the holes.
Takes a long time to clean.
Cage can be as huge as your room can accommodate.
Takes the least time to clean.
Urine will not overshoot & the floor surrounding the cage is dry UNLESS the Coroplast is not well secured at the corners.
If you use at least 4 cm of Breeder's Choice, your cavies should remain nice & dry.
Might be difficult to find Cubes & they are quite costly.
Skill & patience needed to build a good cage that lasts.
Improperly built cage may start falling apart within a few months.
Top of cage is uncovered. Quite difficult to make a cover that can be opened.
Almost impossible to move cage with cavies in it. Coroplast base could give way at the corners if you try.
Bedding required. (Extra cost)
Bedding must be replaced.
Have to pick up poop daily.
 Just stick to a cage (wire or plastic bottom) of reasonable size & you'll be fine.